Cloudflare WARP setup with Wireguard on a Ubiquiti Firewall
In this blog post, we will walk you through setting up Cloudflare WARP on a Unifi Router/Gateway using the native WireGuard client. Please note that this method is not officially supported by Cloudflare and is intended for educational purposes only. It should not be used in production environments.
What is Cloudflare WARP?
You’re probably familiar with Cloudflare’s WARP if you’ve found your way to this guide — but just in case, let’s quickly go over what it actually is.
Cloudflare WARP is a service that’s designed to make your internet connection both faster and more secure. While traditional VPNs are mostly about hiding your IP address, WARP is more focused on improving performance. It routes your traffic through Cloudflare’s massive global network to help speed things up, all while keeping your data encrypted and private.
Privacy: Cloudflare promises not to log your browsing activity for things like ads or tracking.
Free to Use: You can use WARP for free, though there’s also WARP+ if you want even faster speeds, this routes traffic through the least congested paths.
Getting your Cloudflare WARP Wireguard Config
To generate a WireGuard configuration for Cloudflare WARP, we'll use the following GitHub project: https://github.com/rany2/warp.sh/
As always, I recommend reviewing the script before running it. You can view it here: https://github.com/rany2/warp.sh/blob/master/warp.sh
By using this you agree to Cloudflare's ToS: https://www.cloudflare.com/application/terms/
First ensure you have the required packages:
sudo apt install curl jq wireguard
Run the config generator:
curl -sL https://raw.githubusercontent.com/rany2/warp.sh/refs/heads/master/warp.sh | bash
Use Cloudflare Zero Trust WARP?
- Visit https:/-your teams id here-.cloudflareaccess.com/warp
- Authenticate yourself as you would with the official client
- Check the source code of the page for the JWT token or use the following code in the "Web Console" (Ctrl+Shift+K):
console.log(document.querySelector("meta[http-equiv='refresh']").content.split("=")[2]) - Run the config generator with the
-Tflag and your token
curl -sL https://raw.githubusercontent.com/rany2/warp.sh/refs/heads/master/warp.sh | bash -s -- -T yourJWTtokenhere
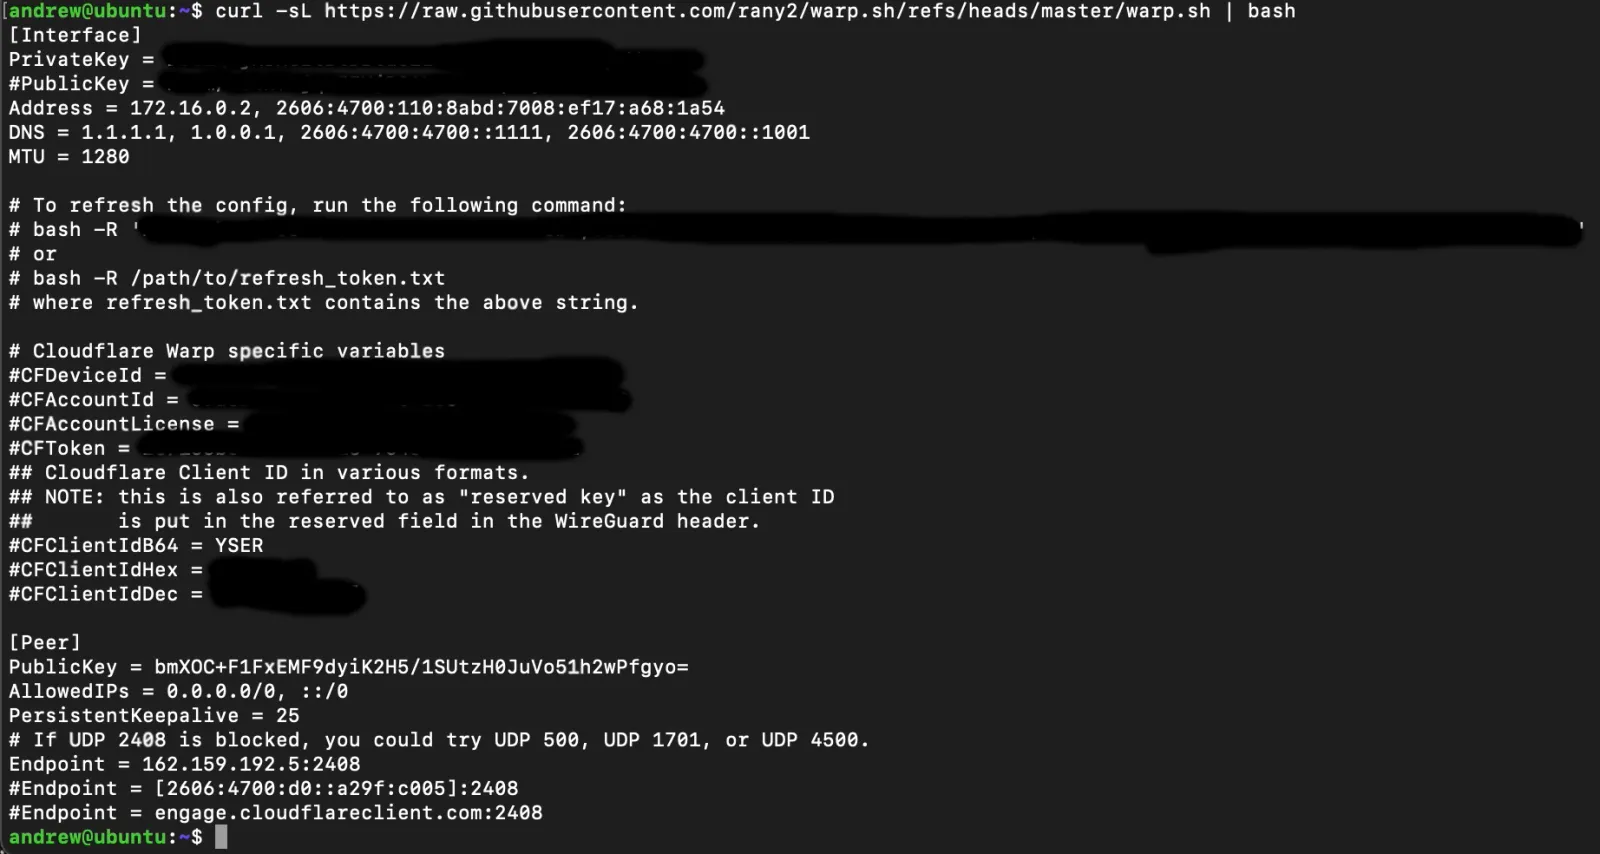
In order for Unifi not to throw an error we need to tiny it up a little:
- Removed all commented lines (ones starting with #)
- Remove the IPv6 Addresses under
AddressesandDNS(for some reason only IPv4 is supported)
Your config should now look something like this:

Configuring in the Unifi Console
This part is pretty straight forward!
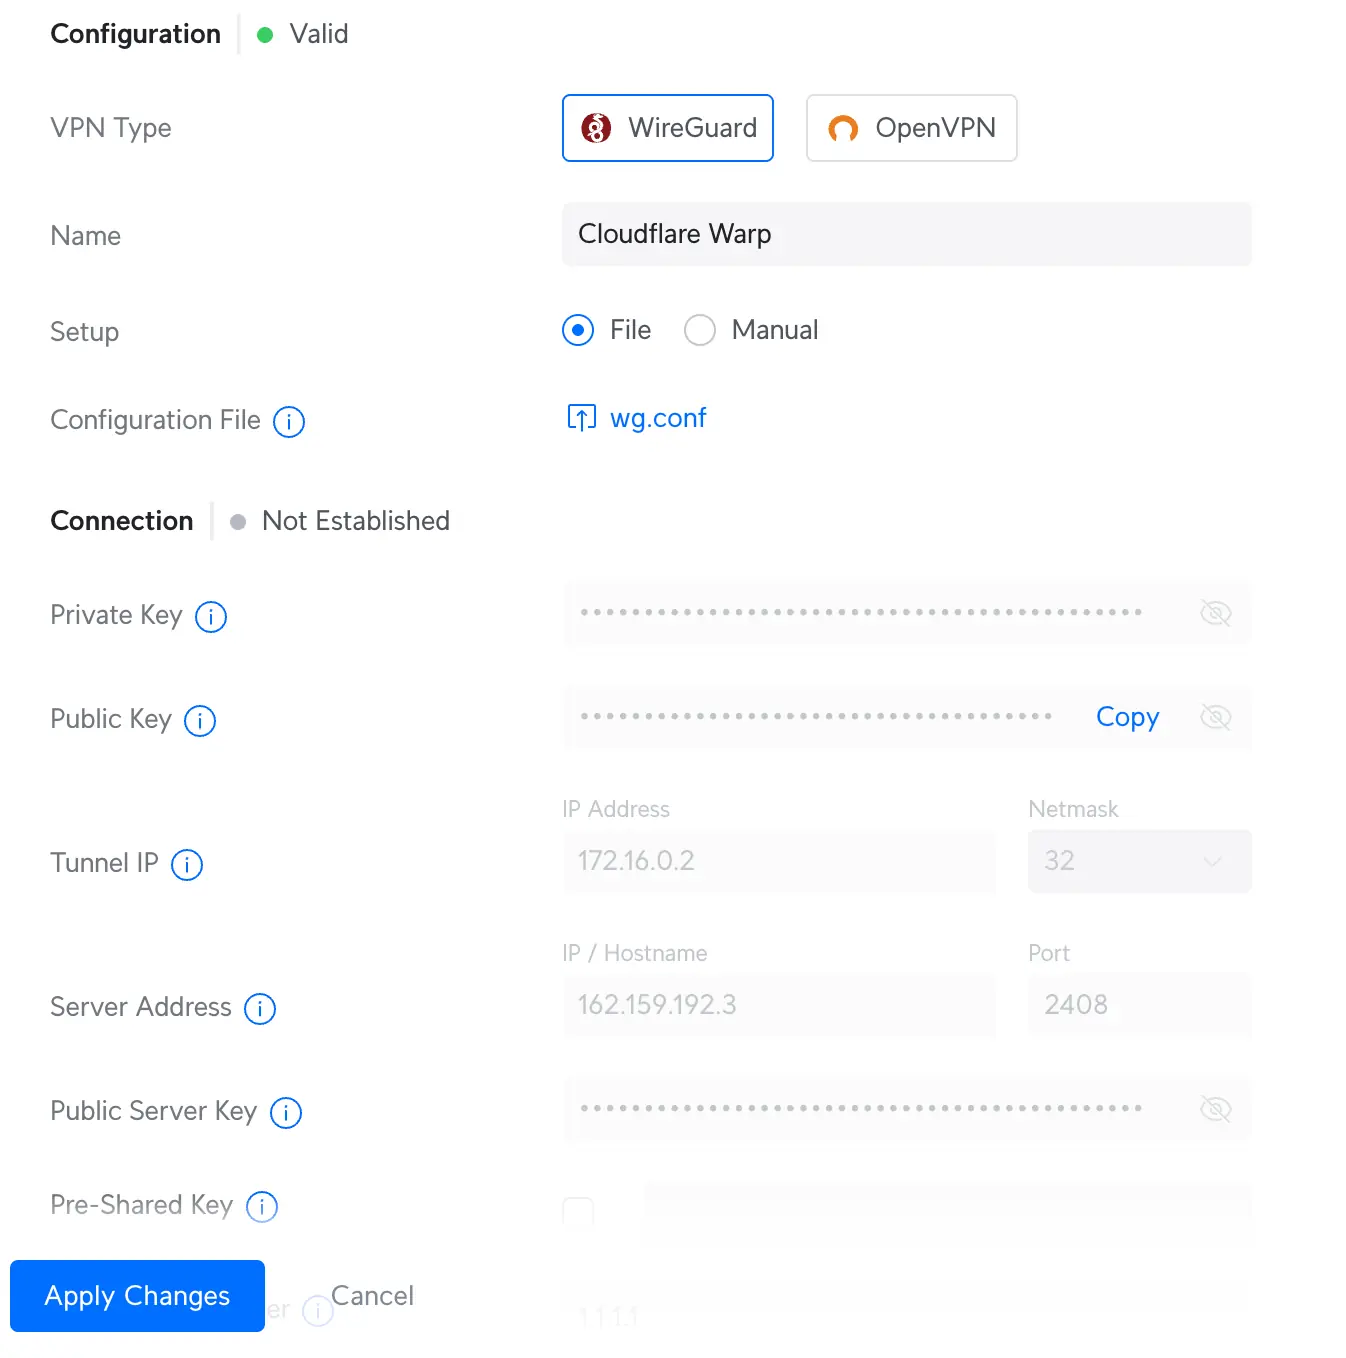
Head to Settings > VPN > VPN Client and hit Create New
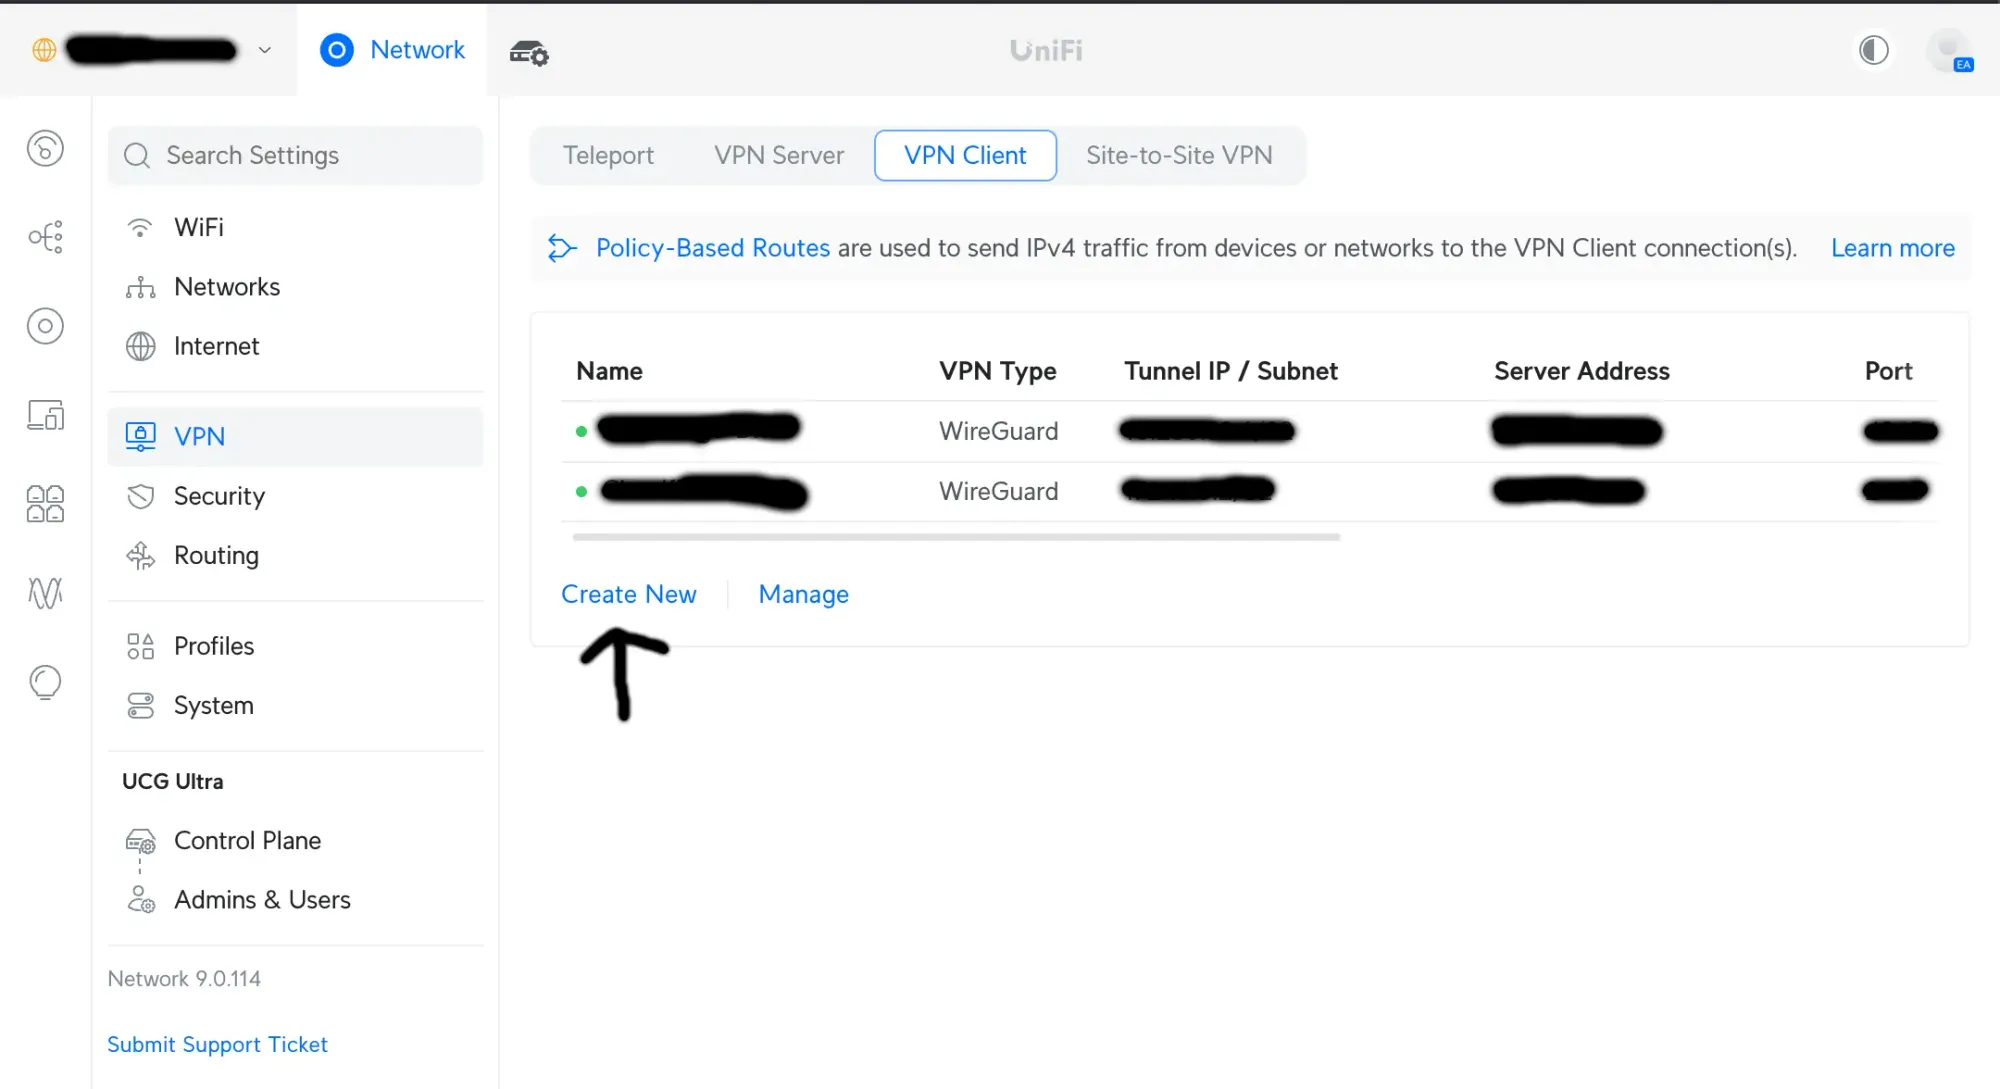
1) Select Wireguard
2) Upload your cleaned up config file
3) Give your VPN Client a name
4) Hit save
Now that's Cloudflare WARP all setup!
Just head to Routing > Policy-Based Routes and configure what is going to be routed over the tunnel!