Where to start with Self-Hosting - A Beginners Guide
Last Updated: 28th July 2021
Contents
Intro
Hardware
Domain Name
DNS
Docker and docker-compose
Reverse Proxy
Dealing with Dynamic IP
Dealing with CG-NAT
Port Forwarding + Cloudflare
Updating
Backups
Recomended Services to Setup
Handy Self-Hosting Sites
Intro
Self Hosting your own services has a wide range of benefits. It's a great way to gain a deeper understanding of tech and how the internet works under the hood. You're in charge of you're data, where it's stored and who has access to it.
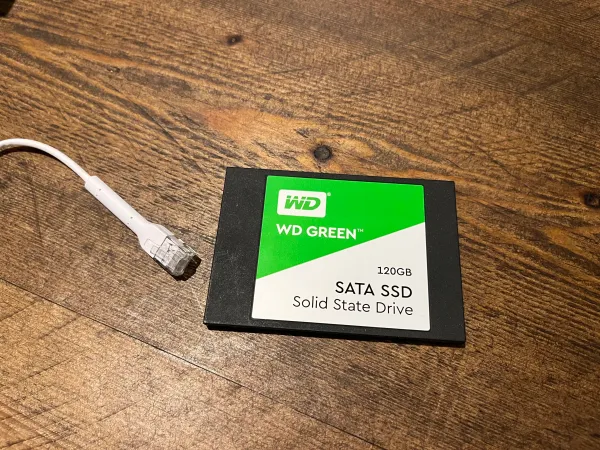
Hardware
Don't get put off by the scary Dell PowerEdge servers in the cover image, we won't be needing that much processing power! Any old laptop or a Raspberry Pi 4 is a great way to get started, just be a little cautious with the energy consumption of older hardware.
You don't even need to own the hardware, instead you can pay monthly for a VPS (Virtual Private Server) where you are allocated a small chunk of a server located within a datacenter. You can expect to pay £3-10 per month for this.
Free 6 months Hetzner VPS (€20 Credit) - https://hetzner.cloud/?ref=856Q9IoYPDxZ (Referral)
Domain Name
Although you can connect to your self-hosted services directly by IP address paired with a port. Using a domain name makes it more user friendly and easier to set up HTTPS. There are many domain name providers out there. You can expect to pay between £4-10 a year for this, just shop around for a good deal with a quality provider.
DNS
DNS (Domain Name Service) is a fundamental part of the internet as we know it, when you head to example.com your computer will reach out to a DNS server such as 1.1.1.1 or 8.8.8.8 to retrieve the IP address behind the domain name 93.184.216.34.
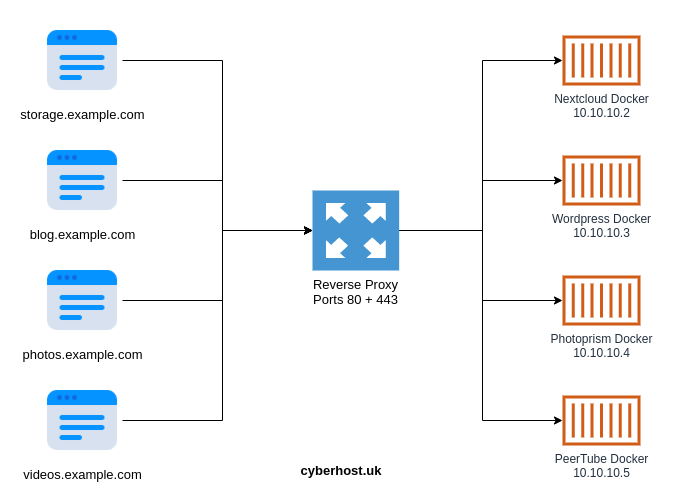
To run multiple services on one domain name sub-domains can be used such as:
storage.example.com
blog.example.com
notes.example.com
Read further about setting this up here
The standard DNS record is an A record, when this record is resolved an IPv4 address will be returned, if you're server/ISP support IPv6 you can add an AAAA record so an IPv6 address will be returned. You can use both of these at once to support both technologies.
Docker and Docker Compose
Docker is the most common way to deploy different services on the same hardware. Docker is an open-source containerization platform, the containers run their own operating systems and are preconfigured by the maintainer, however, these can be changed with environmental variables or a config file.
Benefits of Docker:
- Simple to set up and maintain
- Containerisation improves security
- Backups are made easier
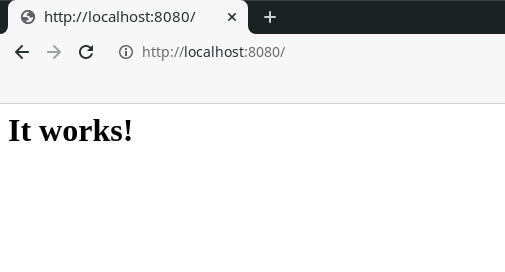
The standard way to run a docker container is with a docker run command which looks like docker run -dit --name my-apache-app -p 8080:80 httpd:2.4
This uses the apache image httpd:2.4, the container exposes port 80 however port 8080 is being opened on the host machine. Running this basic command gets apache up and running in a few seconds.
Docker Compose
The issue with using a docker run command is it makes maintenance difficult and the commands become confusing with more complex images.
A docker-compose.yml is how I'd recommend launching docker containers, it's far easier to edit or reference back to later.
Apache Docker Compose:
version: '2'
services:
    apache2:
        image: httpd:2.4
        ports:
            - 8080:80
I would recommend creating a folder for each service in your home directory /home/<USER>/<SERVICE> eg:/home/cyberhost/apache and placing the docker-compose.yml file in there.
To deploy the docker container run docker-compose up -d in the same directory as the docker compose file.
Reverse Proxy
A reverse proxy allows us to run multiple services behind the ports 80(HTTP) and 443(HTTPS) and introduce HTTPS to encrypt the data.
There are a few different options of reverse proxy Nginx, Apache, Traefik, HAProxy and Caddy.
I'd recommend using Caddy for a few reasons:
- Super easy to get started
- Built-in a memory-safe language (Go)
- HTTPS by default (provisions and renews certificates for you)
- HTTP to HTTPS redirect by default
To set this up follow the docs or our guide.
Using the following Caddyfile (Caddy config file):
localhost {
    reverse_proxy 172.17.0.2:8080
}
Enable the new config with caddy reload
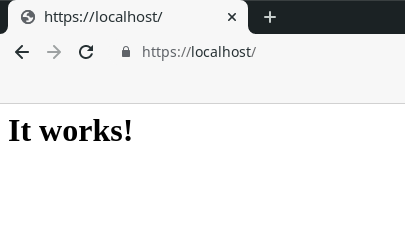
Your config will be slightly different replacing localhost with a sub-domain such as service.example.com. Caddy will automatically fetch a Lets Encrypt HTTPS certificate on caddy reload, just ensure the sub-domain resolves into the public IP of the server and it's reachable otherwise this will fail.
Dealing with a Dynamic IP
If you are hosting at home on a residential connection chances are you have a Dynamic IP address this is where your IP address will rotate now and then. To solve this issues there are many Dynamic DNS providers, they work by you connecting to their server every few minutes and the IP making the request will be used as the DNS entry allowing you to connect in.
I'd recommend duckdns it can be run with this docker image.
When using duckdns your IP will be positioned behind a sub-domain of duckdns such as xxxxxx.duckdns.org, to maintain using your own domain name you can use a CNAME record.
Example: service.example.com uses CNAME record of xxxxxx.duckdns.org so you'll connect to the IP situated behind xxxxxx.duckdns.org.
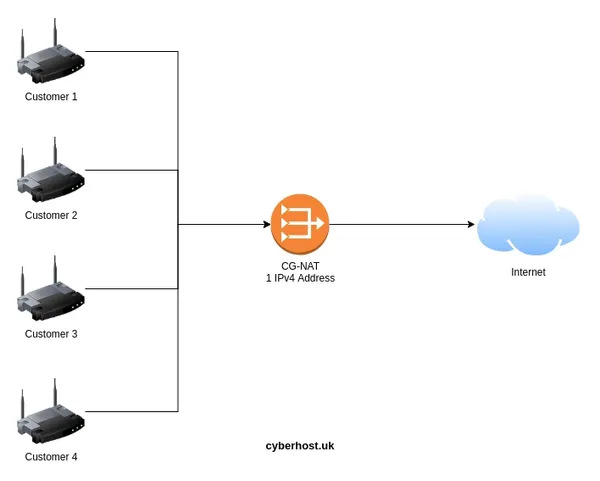
Dealing with Carrier Grade NAT (CG-NAT)
As the IPv4 address space has been exhausted, many ISP's have reduced their usage by implementing a CG-NAT, this is where multiple customers share the same IPv4 address. This basically makes port-forwarding impossible.
Cloudflare Argo Tunnel - Self-Host with a CG-NAT
Port Forwarding + Cloudflare
If you are sitting behind a Router/Firewall you'll want to port forward. This is so your hardware and reverse proxy is accessible from the internet.
You may want to consider adding Cloudflare in front of your services, this will prevent sharing your IP address when sharing links to your self-hosted content. Please note due to the nature of Cloudflare they will decrypt and re-encrypt your data leading the opportunity of a MITM (Man In The Middle) so it depends on what you're transferring and your level of trust. Instead of using Cloudflare you could self-host a VPN on a VPS so that you are not exposing services from your home IP, this would a very similar if not identical setup to what you'd use when dealing with a CG-NAT.
Updating
It's important to ensure that all software is kept up to date as these often come with critical security fixes you may even get some fancy new features!
Linux
Install the latest packages for your Linux distribution.
Debian & Ubuntu: sudo apt update && sudo apt upgrade
Arch: sudo pacman --sync --refresh --sysupgrade
CentOS: sudo dnf upgrade
Docker
To update a docker container you'll want to fetch the latest image. The traditional method would be to docker pull <image>, remove the container and spin it up again.
We can use docker-compose to speed up this process docker-compose pull fetches all images used within the docker-compose.yml file and docker-compose up will launch the container if a new image was available.
Update with Docker Compose: sudo docker-compose pull && sudo docker-compose up -d
To make this process easier we can create an alias by editing the .bashrc file in your home directory.
Some example aliases you can add to the bottom of the .bashrc file:
alias dc-up='sudo docker-compose --compatibility up -d'
alias dc-update='sudo docker-compose pull && sudo docker-compose --compatibility up -d'
alias dc-update-all='for d in ./*/ ; do (cd "$d" && dc-update); done'
dc-update-all goes into each directory and runs the dc-update which pulls any new images and will restart the containers if there was a new image available. This assumes you have a directory per docker service.
Backups
The most important step, you don't want to lose all that effort and data so ensure you run automated backups. Autorestic an Duplicati are great options for this.
Recomended Services to Setup
Adguard Home - https://cyberhost.uk/adguard-setup/ (Don't use with a cloud VPS)
Jellyfin Media Player - https://cyberhost.uk/how-to-self-host-jellyfin/
Nextcloud - https://cyberhost.uk/nextcloud-install-docker/
Handy Self-Hosting Sites
https://selfhosted.libhunt.com/
https://github.com/awesome-selfhosted/awesome-selfhosted
Subreddits
/selfhosted
/homelab
/HomeServer
/datahoarder
Cover Image Credit: https://unsplash.com/@fennings